
Saturday, November 20, 2010
WDS - Windows Deployment service
Posted by K. Ezhil Kumar | Saturday, November 20, 2010 | Category:
Windows 2003 Server
|
Install Windows Deployment Service
Go to Control panel - Add or Remove programs - select Add/Remove Windows Components

Select Windows Windows Deployment Service.

Restart your computer after installing

****************************************************************
Configuring Windows Deployment Service.
After restart Go to Start - All programs - Administrative Tools - Windows Deployment Service.

Right click on Server and click Configure server.

Windows Deployment Service configuration wizard shows requirements for wds. Click Next.

Select Remote install folder location and click Next.

Click Next.
Note: if you want DHCP option 60 you can select.

In PXE server initial settings window whatever you want you can select and click Next.

If you configure now you can check add images to the windows deployment server now check box or Remove that check box and click Finish.

Now successfully configured, you can view WDS windows like this.
****************************************************************
How to Add Boot images in WDS
Image type : .WIM (Windows Imge)
You can use the Boot.wim from the installation Windows Vista, Windows 7, windows 2008server DVD (in the \Sources directory).
The Boot.wim contains Windows PE and the Windows Deployment Services client
(which is basically Windows Vista Setup.exe and supporting files).

Right click on Boot Images in WDS.

In the Add boot image wizard browse to choose the default boot image (Boot.wim) located on the Windows 7 DVD, in the \Sources directory, click open and click Next.
Note : I used windows 7 boot image.

In the image name box You can rename whatever you want.
Click Next

Click Next.

Click Finish.
****************************************************************
How to Create Capture Boot images.

Choose Boot Images, Right click on already added boot image and select Create Capture Boot image


The next windows shows image capture progress, after complete click Finish
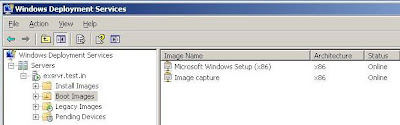
After image capture you can see captured image in boot image section like this
****************************************************************
How to Add Install Images in WDS
Image type : .WIM (Windows Imge)
You can use the Install.wim from the installation Windows Vista, Windows 7 (in the \Sources directory).

Right click on Instll Images in WDS.

Type Image group name and click Next.

Open Install.Wim file from windows vista or windows 7 DVD (\source) or open file where you saved.

Select what you want and click Next.

Click Next.

Image capture progress going on....

Click Finish

After image capture you can see captured image in Install image section like this
****************************************************************
Creating custom Install Images
Requirements:
1. sysprep tool
On the Windows xp CD (in the \Support\Tool) Note : If you capture in windows vista use Vista Sysprep tool.
2. PXE Boot option in client computer
3. At least 512MB of RAM

Open DEPLOY.CAB file in Xp cd (\SUPPORT\TOOLS\DEPLOY.CAB)
Copy all the contents to C:\sysprep folder


Type the command c:\sysprep> sysprep -mini - reseal - reboot
(or)
Use the following
Double click the syspre.exe

Click OK

Select Use Mini Setup option, Shut down or restart and click Reseal

Click OK

Sysprep is preparing ...........

After Shutdown or restart
Enable PXE boot in BIOS. Press F12 button computer to boot network

IF you configured WDS properly You can able to view the boot images at the network boot time on the client computer.

Loading file from server.............

Click Next

If you ran sysprep tool Image captured wizard shows only C:\. Select C:\

Type Image name,description and click Next.

On the Image Capture Destination page, click Browse select the location where you want to store the captured image.
(or)
Select Upload image to WDS server. Type Server name or IP address, Select Image group name which group you want to store and click Next

Capturing process going on

Click Finish
****************************************************************
Installing an install image
Enable PXE boot in Client computer. Press F12 button computer to boot network
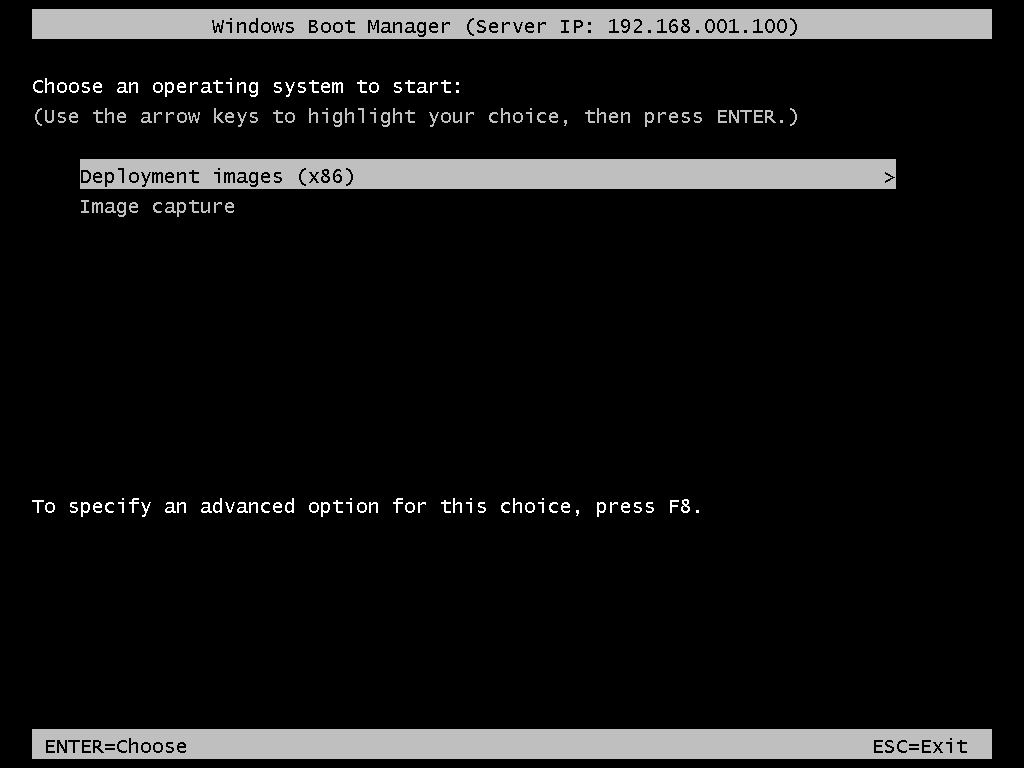
Select Deployment image


Click Next

It will ask user name and password type domain\user name and password
click ok

Select which one you want Click Next

If you want format and resize partition click advance options


Setup is installing windows

When installation is complete, the computer will restart and Setup will continue.
Need more information use following links
Need more information use following links
Step by Step Guide for WDServices in Windows Server 2008 Click here to download
****************************************************************
Subscribe to:
Post Comments (Atom)
Currently have 0 comments: